AWS CloudFormation provides a common language for you to describe and provision all the infrastructure resources in your cloud environment. CloudFormation allows you to use a simple text file to model and provision, in an automated and secure manner, all the resources needed for your applications across all regions and accounts. This file serves as the single source of truth for your cloud environment.
A single file? Sounds too good to be true—but it’s not!
CloudFormation lets you create whole environments of AWS services, including Amazon Virtual Private Cloud (Amazon VPC), Amazon EC2, Amazon S3, Amazon EC2 security groups, and many more. And you can use these CloudFormation templates repeatedly, making it super easy to launch a complex environment with just a few clicks.
Now that you know what CloudFormation is, let’s walk through a simple example of using it to launch an Amazon Linux v2 T2 instance that automatically installs the New Relic infrastructure monitoring agent. The purpose of this post is to provide you with an example you can use to design your CloudFormation scripts.
Programming fun!#?@
Before we get started, though, there’s one thing I need to warn you about. Most of what goes into writing an AWS CloudFormation document is pretty straightforward. However, when you get to the part where you are writing your scripts in either BASH or Windows PowerShell, be aware that you are also wrapping that code within JSON. This means you need to do two levels of debugging: one for JSON and another for the BASH or PowerShell script.
Another tip: If you can, create the BASH or PowerShell script in a live environment first. Make sure it works, then take that working script and add it to your JSON document. You’ll still need to replace some of the code with parameters where necessary, but at least you’ll reduce the debugging as much as possible.
With that in mind, let’s dive in.
How to use the CloudFormation template
1. From the AWS Console, open CloudFormation (located in the Management Tools section).
2. Create a new stack: select Create Stack:

https://kupsand.s3.amazonaws.com/NewRelic/NR-Infra-CloudFormation.json

4. Select Next, and in the Specify stack details interface, give this stack a name that makes sense for your needs, for example, NR-infrastructure.
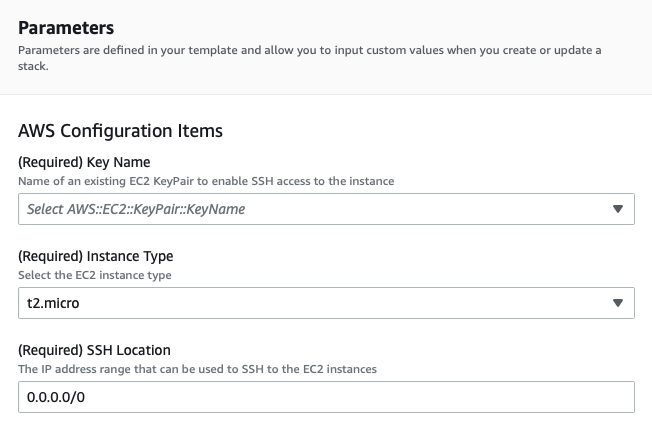
5. Then enter the AWS Configurations Items for Key Name (your key pair), Instance Type, and SSH Location.
Note: It’s not mandatory for this tutorial, but it’s a good idea to lock down the SSH location for better security. The 0.0.0.0/0 in this example screenshot is open to the whole world.
6. After you finish inputting the AWS Configuration Items, you’ll add your New Relic ingest-license key (required). You can find this ingest-license key under API keys in the New Relic console.
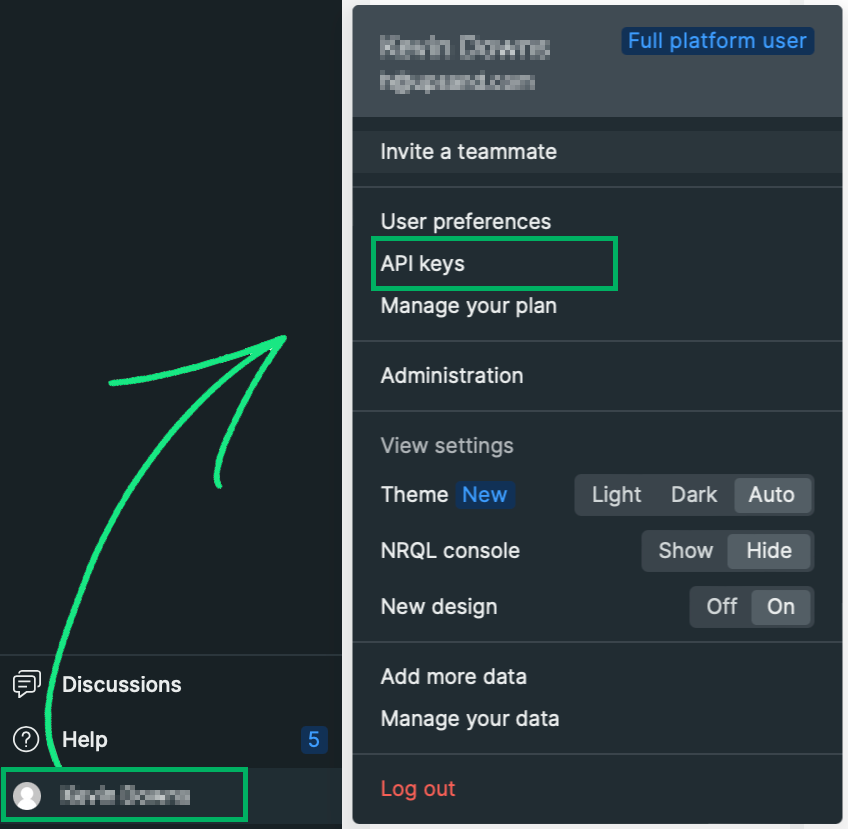
Then paste it in here:

7. Next, you’ll complete the New Relic optional configuration items. Set the Display Name appropriate for your instance. See our infrastructure agent configuration settings documentation for more information. You can modify your CloudFormation script to include other available parameters if you’d like.
8. Finally, set any other New Relic optional custom configuration items you want to use.

9. When you finish the configuration section, select Next. You’ll be prompted to set some additional optional settings. These include tags (name your instance with the Name/[name] key/value pair), permissions, stack failure options, and other advanced options. Add or select any items you wish, and then select Next.
10. CloudFormation opens a review screen containing all the items you’ve entered. Select Submit to build your CloudFormation stack. (Note that at this point, Amazon will charge you for the AWS resources—an EC2 instance—used when you create a stack from this template.)
Wrap it up
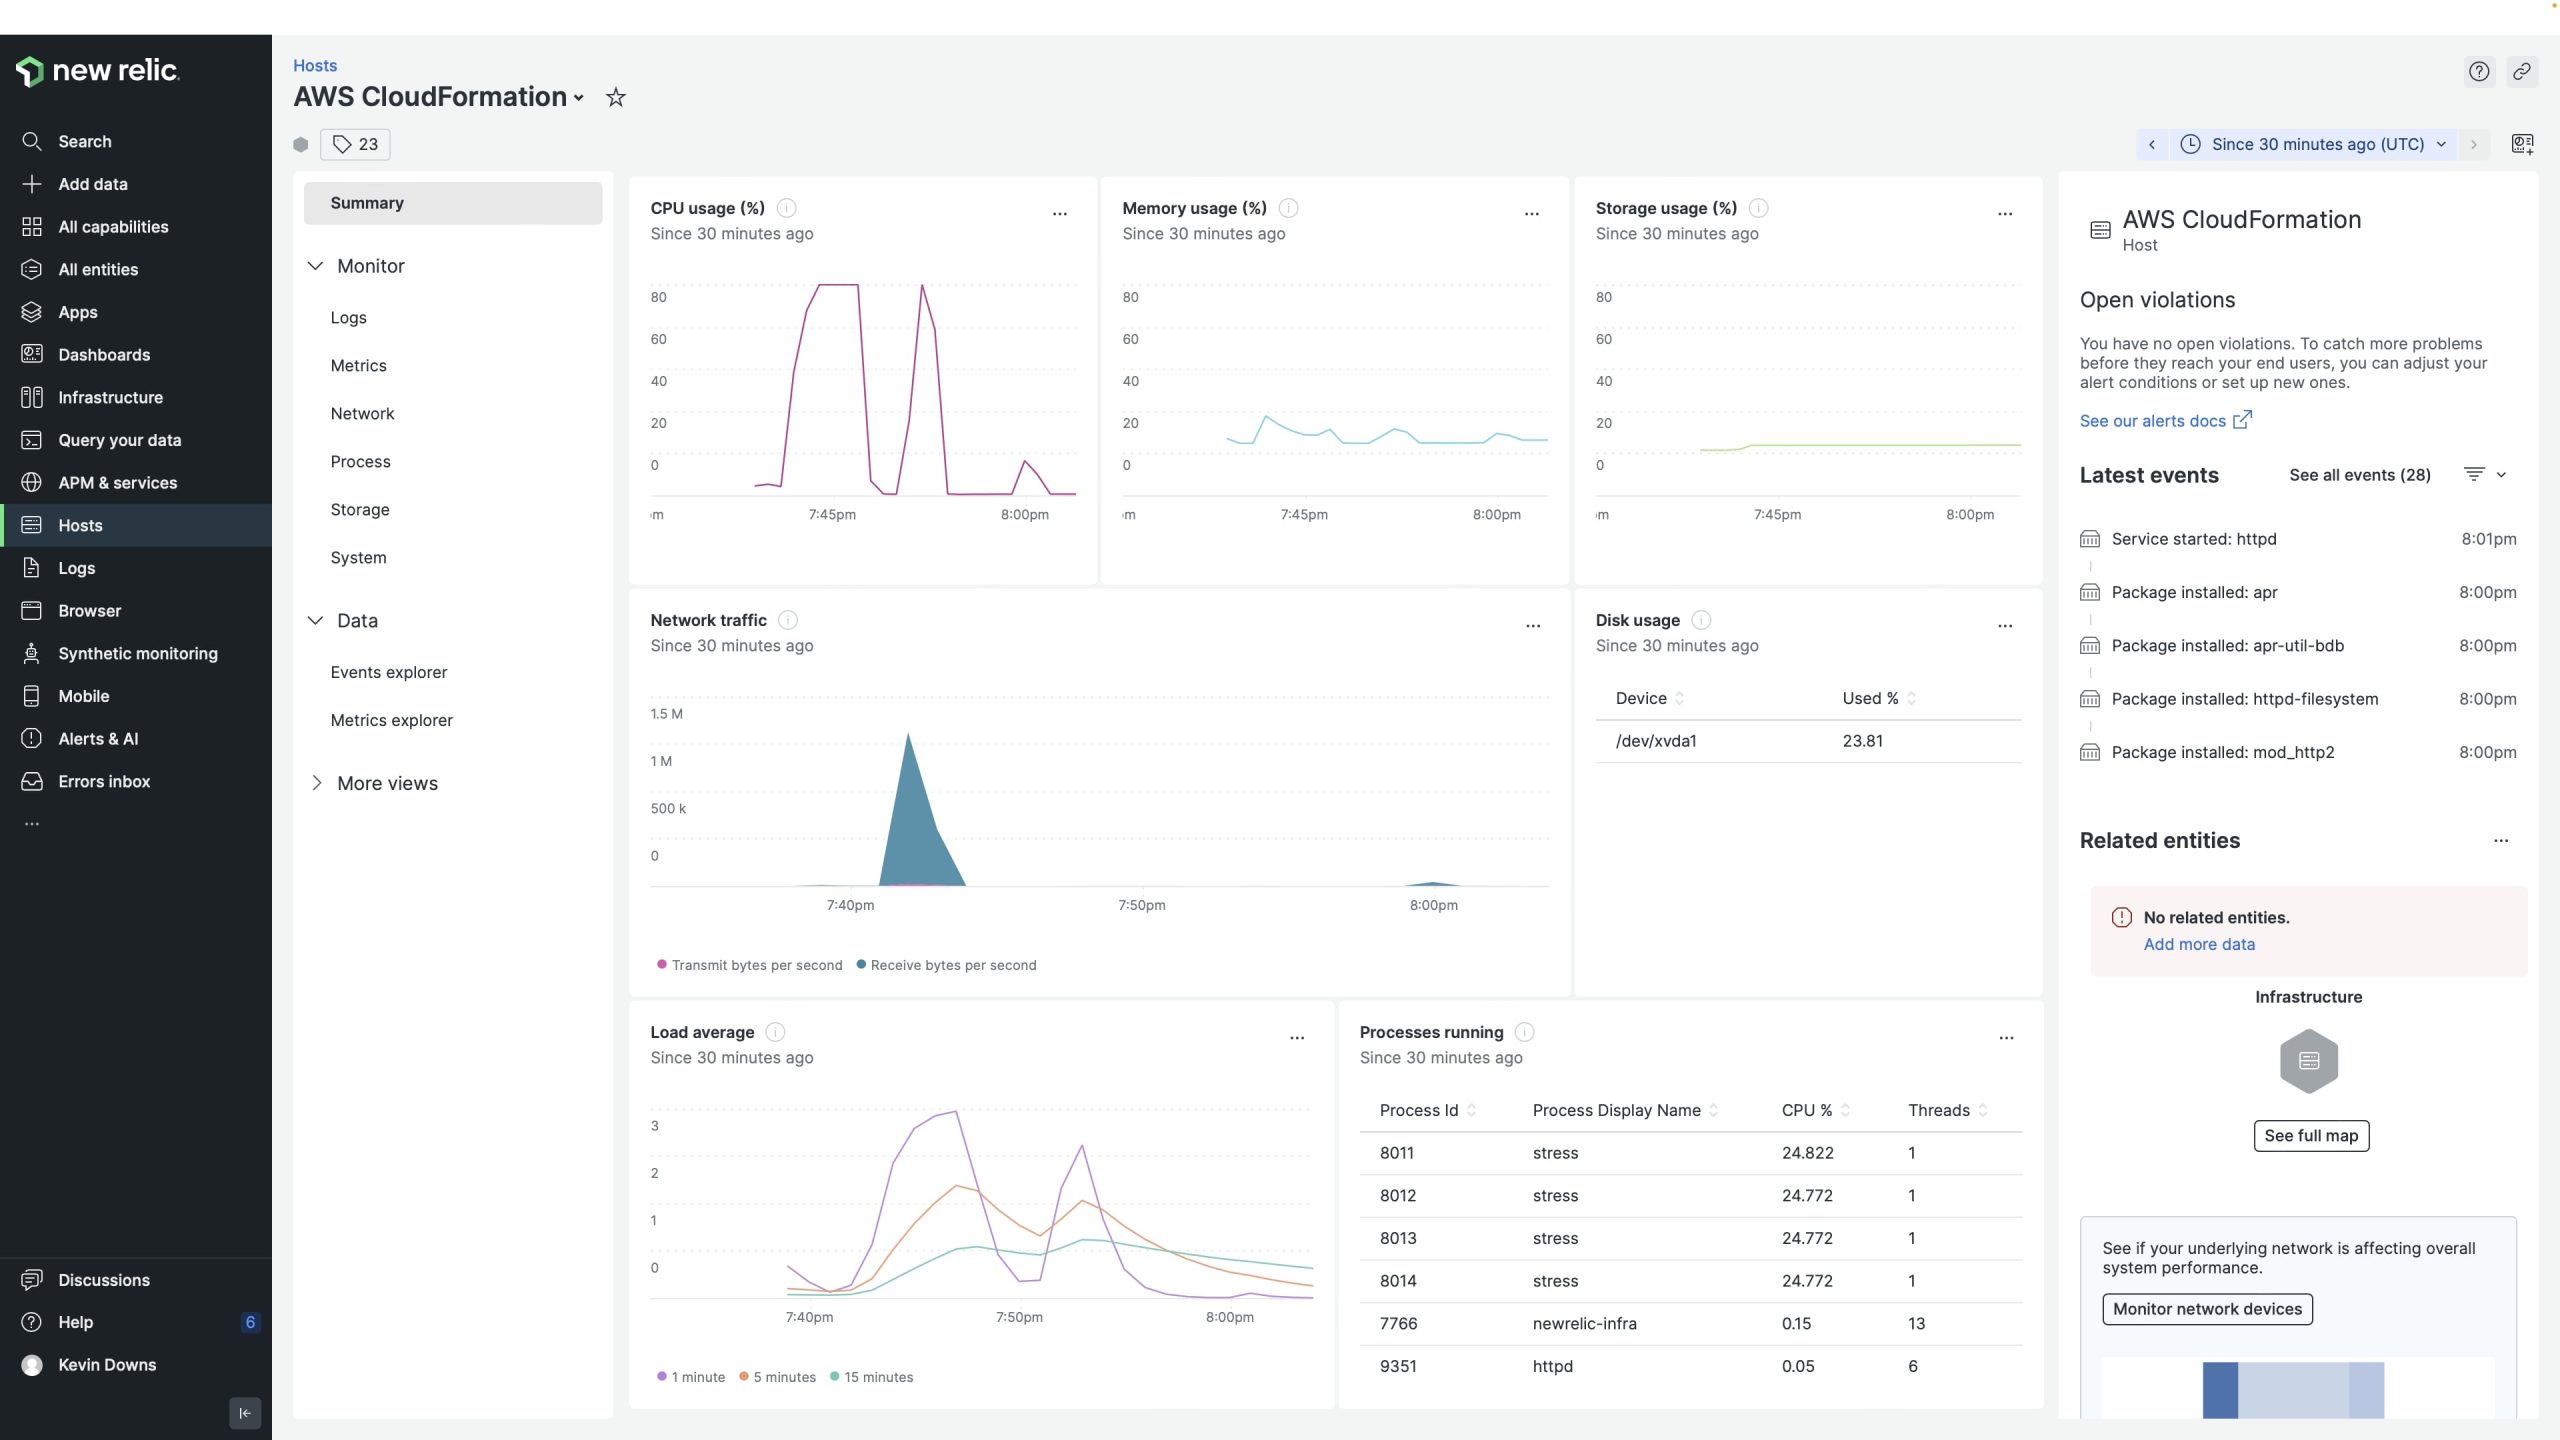
This example launches an Amazon Linux v2 EC2 instance attached to a Security Group that opens up ports 80 (HTTP) and 22 (SSH). This instance also configures and installs the New Relic infrastructure monitoring agent.
Head to your New Relic console to see your new instance displayed there. It takes just about one minute!
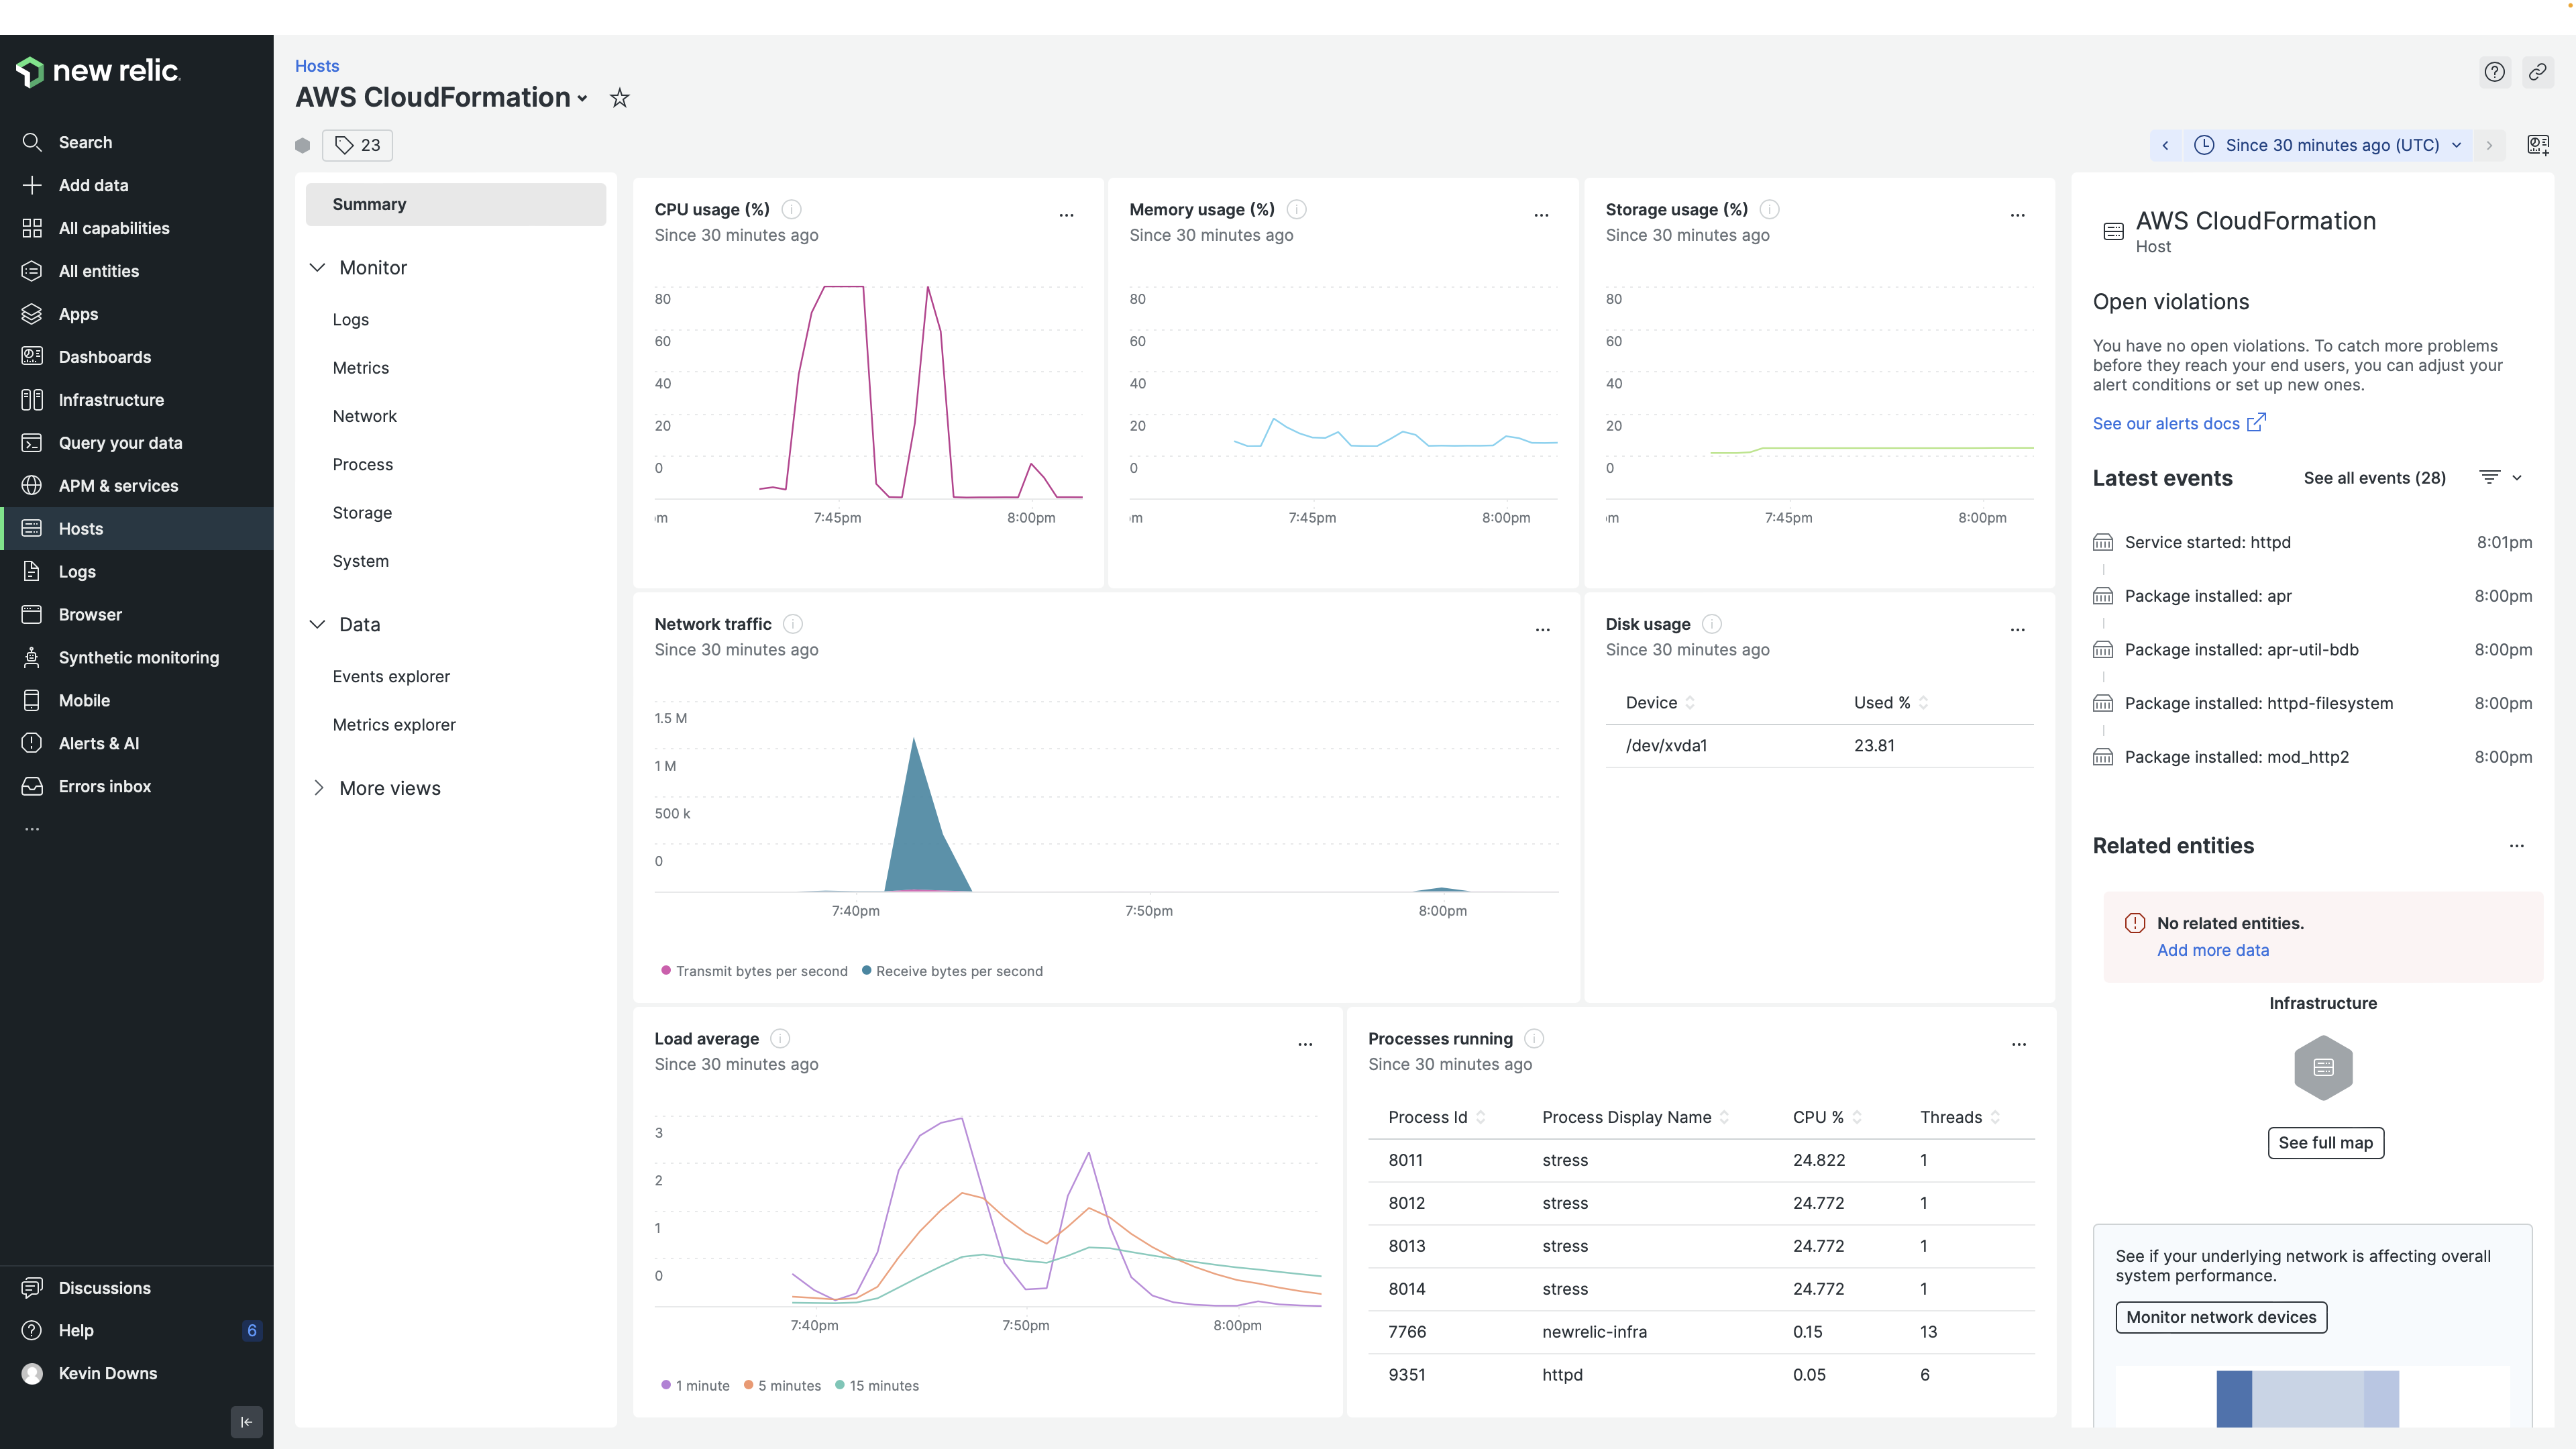
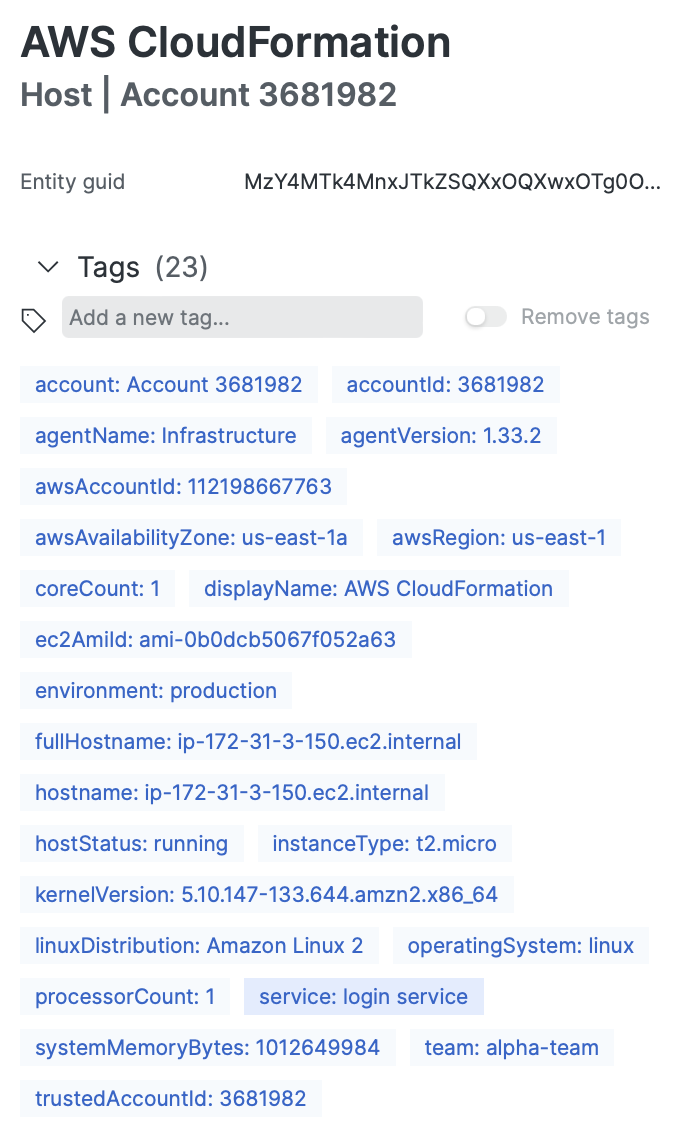
You can also see the instance metadata available to filter and chart. Notice the custom attributes are also available.
If you want to evaluate New Relic state of the art observability platform, sign up for a New Relic account today.