Prerequisites
Note: To create New Relic dashboards in Terraform using JSON templates, you need to be using provider version 3.4.0 or above.
To follow along with the sample code in this tutorial, you’ll need to have Terraform installed. For instructions for installing Terraform and guidance on how to run the examples, see the Github repository nr-terraform-json-dashboard-examples.
Creating a dashboard using JSON
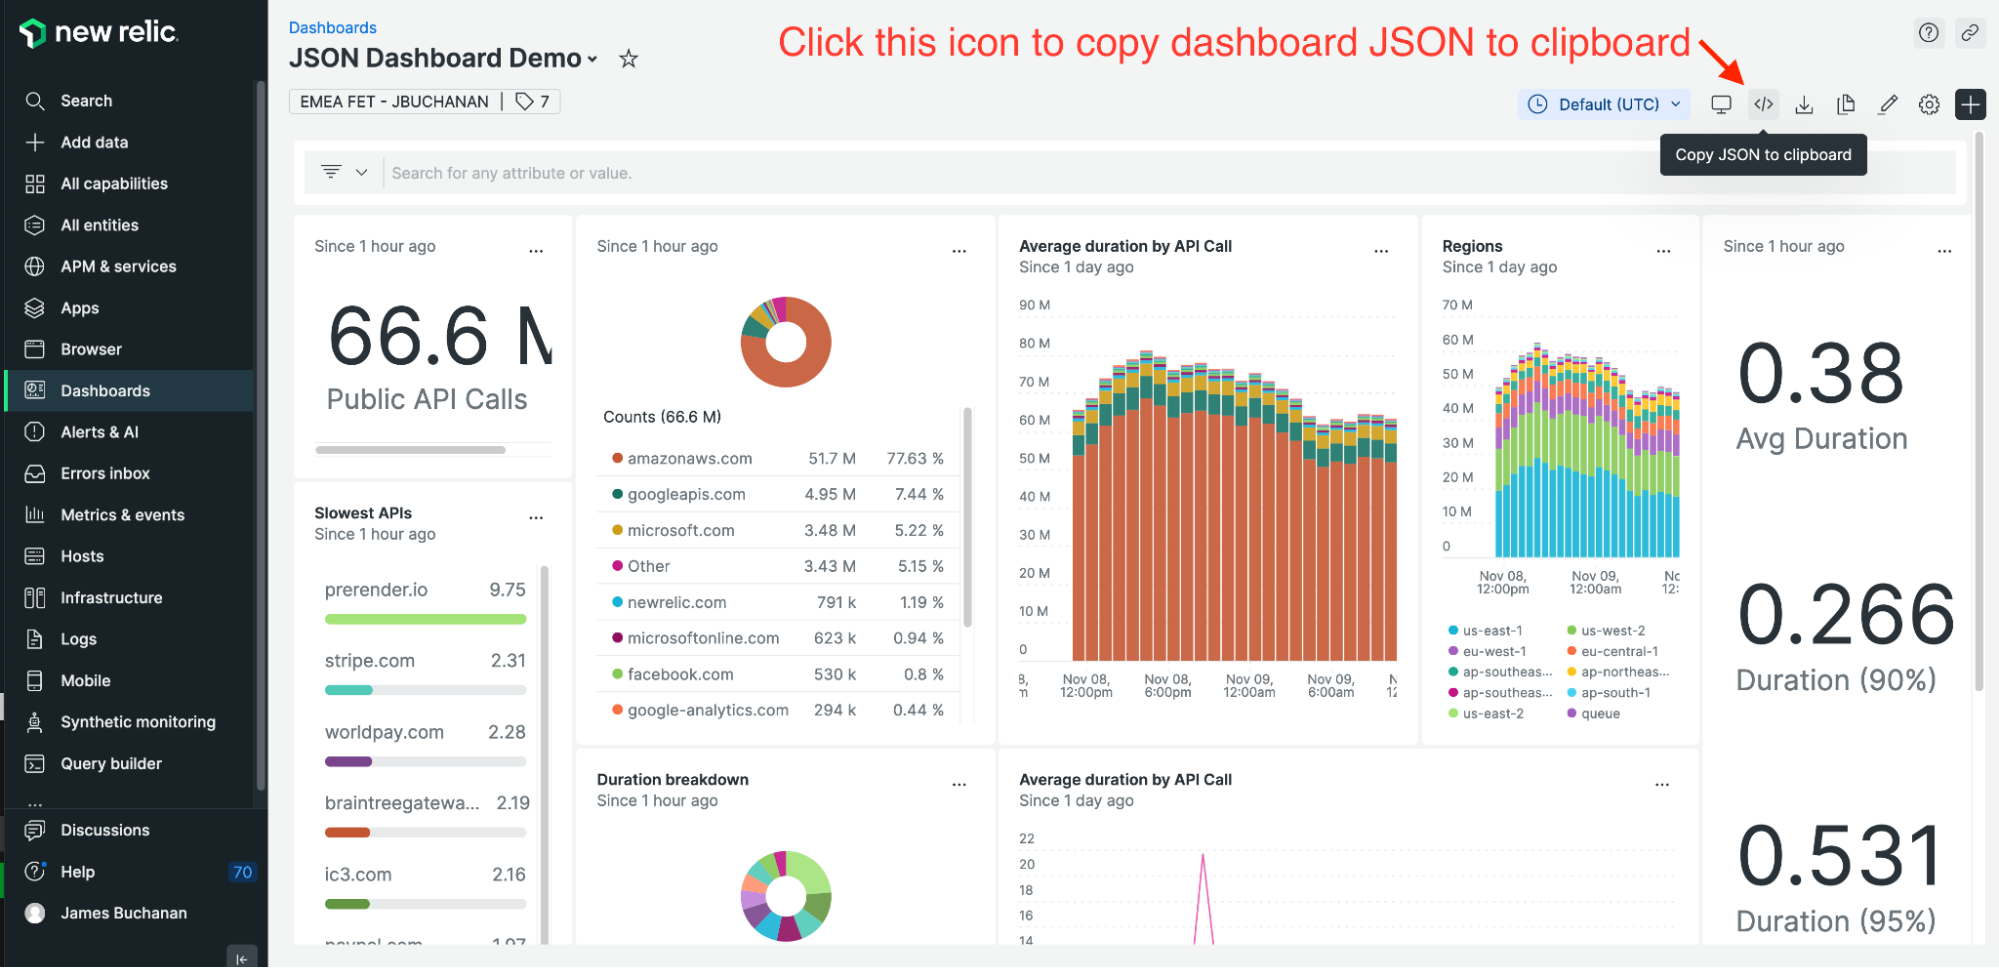
First, get the JSON configuration of any dashboard in New Relic. The dashboard you choose doesn’t matter—you just need the JSON for this tutorial. Find an existing dashboard or create a new one using the New Relic UI and select the Copy JSON to clipboard icon in the top right of the dashboard.
Create a directory in your Terraform project called dashboards and paste the JSON from your clipboard into a new file called dashboard.json. You should update the first “name” attribute in dashboard.json in order to distinguish it from the dashboard you used as a source.
You then need to set up your Terraform configuration to use this dashboard.json as an input. To do that create a file called dash_basic.tf and enter the following HCL code:
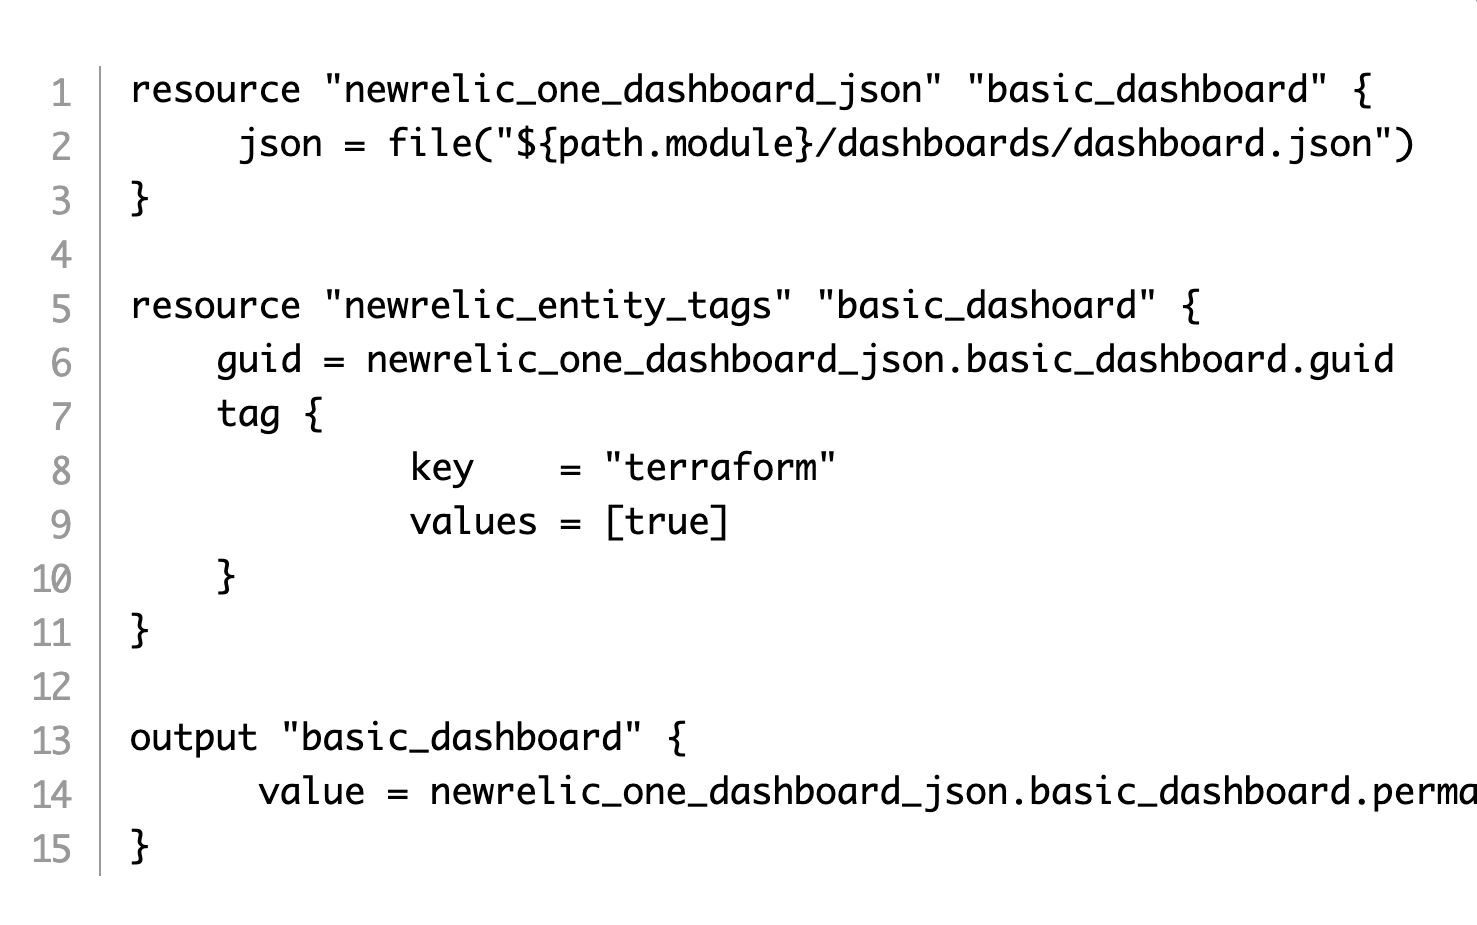
The first block passes dashboard.json to the newrelic_one_dashboard_json resource.
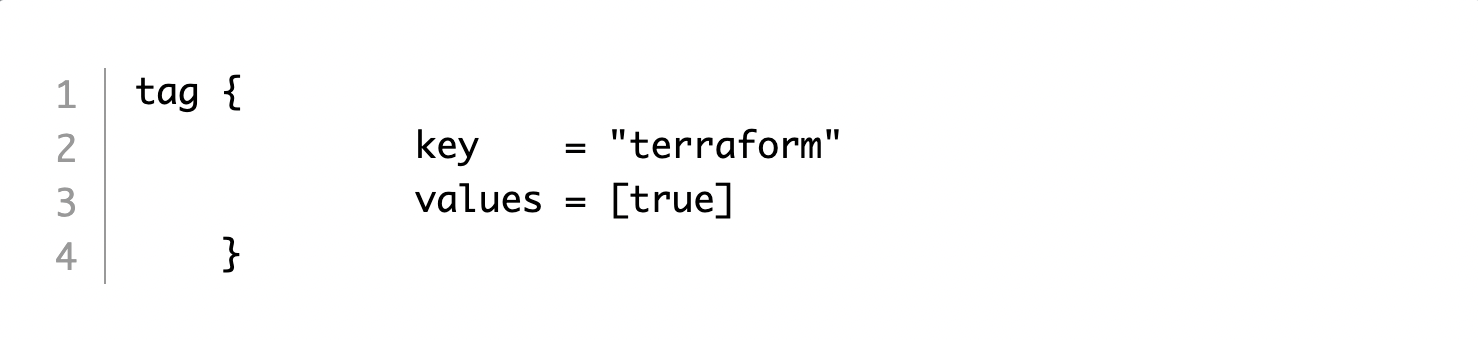
The second block tags the dashboard so you know it’s Terraform-managed, which is a best practice. In this case, the value of the tag is:
Finally, the third block outputs the dashboard permalink to the console so it’s easy to find.
Apply your Terraform and confirm the dashboard is created as expected.
Updating a dashboard
It’s simple enough to create a dashboard but how should you approach updates? Let’s take a look.
Single-use dashboards
This flow chart shows the process for maintaining a single-use dashboard.
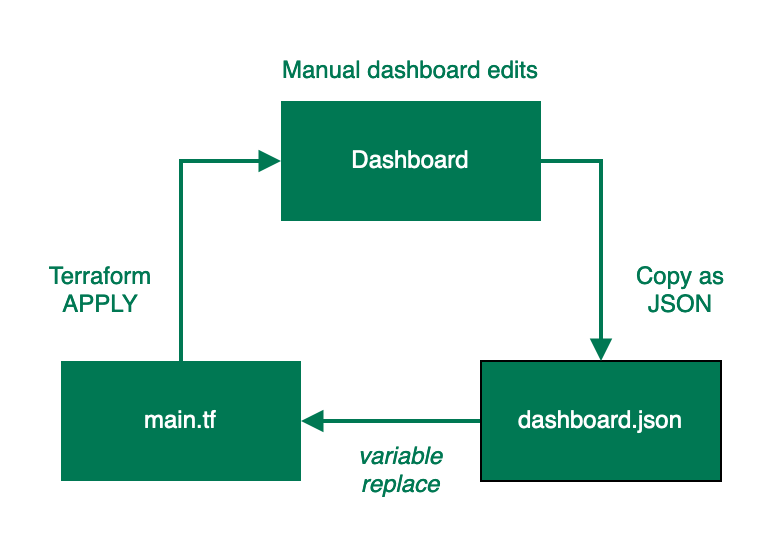
Simply edit the dashboard in the New Relic UI, copy the new JSON configuration to your clipboard, update the dashboard.json file in your project, and reapply your Terraform.
Multi-use dashboards
What if you want to do more with your dashboards? For example, you might want to take a template dashboard and deploy it multiple times with some contextual changes in each dashboard.
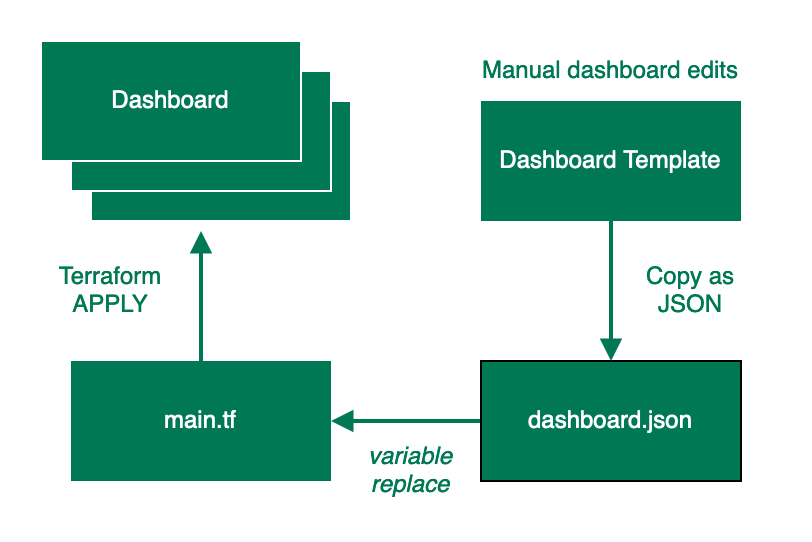
One solution is to create a ‘template’ dashboard that you maintain in the New Relic UI. When you want to change your deployed dashboards, you edit the template dashboard, copy the JSON into your dashboard.json file, and then reapply.
Here’s a flow chart that details what that process looks like.
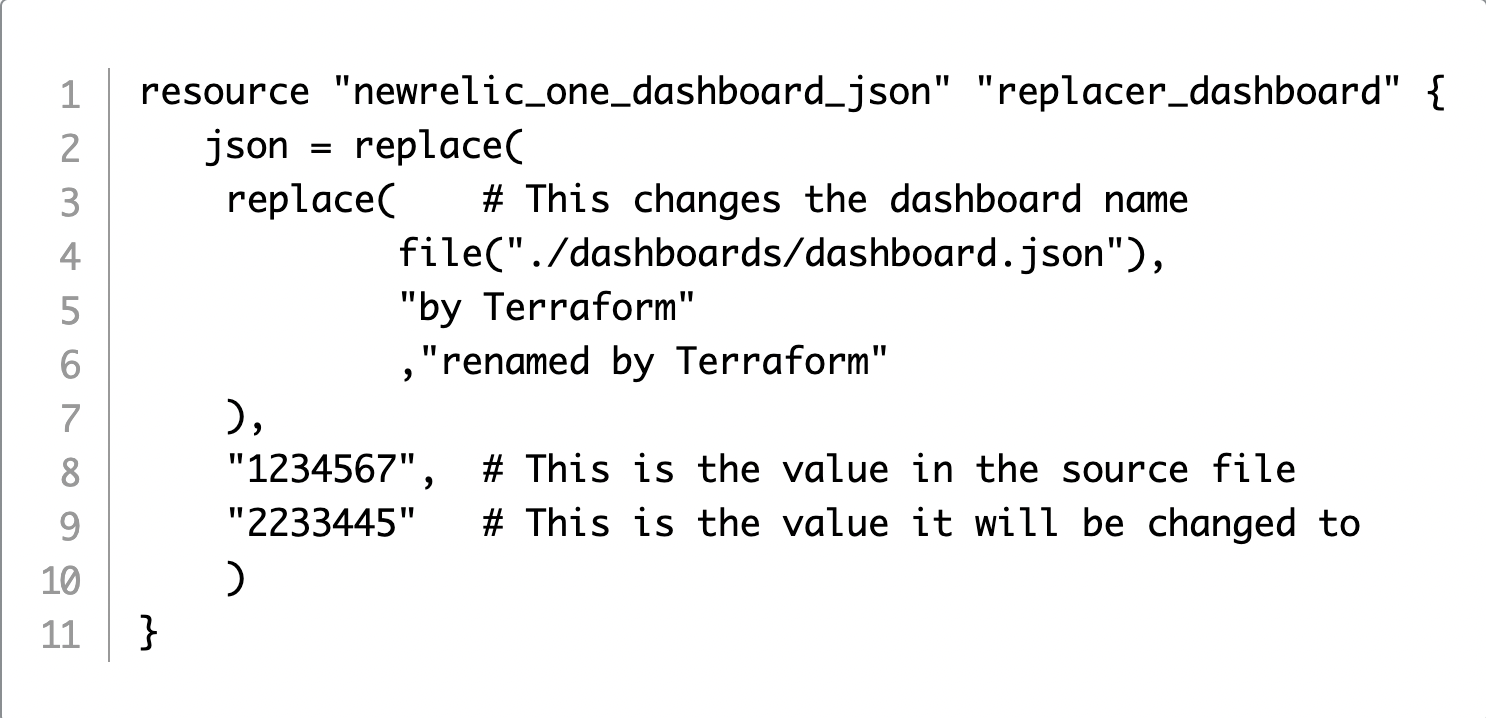
If you’re only making small changes to each dashboard that’s deployed, such as updating an appName or account ID, then you can use the Terraform replace() function to switch out values in the source template for new values in the deployed dashboards.
For example, the next Terraform code example for dash_replacer.tf changes the dashboard name and sets the account ID:
The nice thing about this approach is that anytime you need to update a dashboard, you can simply edit the template dashboard, copy and paste your JSON into the template file, and redeploy.
If you want to make many changes in a template at deployment time, you can use the Terraform templatefile which gives you better control of your changes. However, you’ll have to update your configuration so that it’s compatible with the Terraform templatefile. The dash_templatefile.tf file in the example repo shows an example of this in action.
As you can see, it’s fairly simple to create new dashboards this way—or to redeploy dashboards with a few minor tweaks. But what if you want to do something more complex, such as dynamically creating a dashboard? You’ll learn how to do that in part two of this series.
Next steps
If you’re not using New Relic yet, get started with New Relic now.